 |
| Simple Text Ps |
Hi guys, straight to the poin, today I'm gonna make a tutorial of Photoshop, this is my first tutorial and my first learn how to use Photoshop. This is tutorial is about how to make a simple text design.
Dont worry this is a basic tutorial so i think you can do it easily without any problem. Why can i say like that? Its because i don't have any problem when i try to make it. (lol)
Ok ok I'll not make you wait, check it out. :D
Step 1
First, Photosop must have been installed on your PC, if you haven't install it you can download it on its server, but don't forget to buy the license, ok. After you install it, now run it, so the worksheet will open like this.
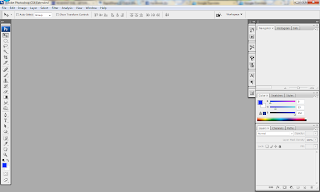 |
| Interface |
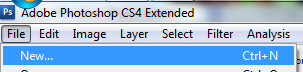
After that we make a new project, you press Ctrl + N for the shortcut or you can do this.
File > New...
 |
| Create New Project |
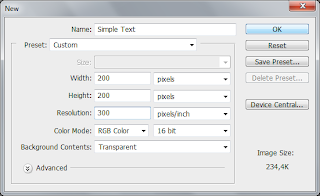
And it will show like this. Set name into Simple Text, the width and height into 200x200px, Color Mode into 16bit, Resolution into 300px, and the background into transparent then click OK.
 |
| New Windows |
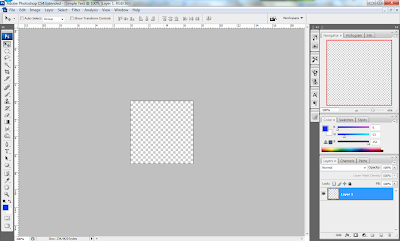
This is the result, a blank worksheet.
 |
| New Work Area |
Step 2
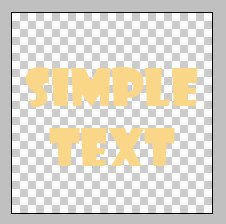
In this step we gonna make a text that read "SIMPLE TEXT" just like the sample image. We can do it like this, first click the Horizontal Type Tool (T) on the Tool Box.
 |
| Text Tool |
After that make the Text like this. In this tutorial I use #fad689 for the color of the text and Showcard Gothic Font Style.
 |
| Text had been made |
Step 3
In this step we gonna make the offside text. But first we change the foreground color on the Tool Box into #0035fc.
 |
| Change the foreground color |
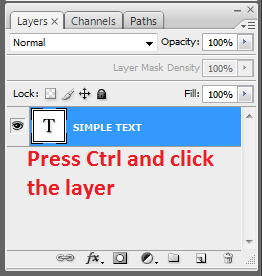
After that select the text by pressing Ctrl + Click the layer of the text.
 |
| Selected the text |
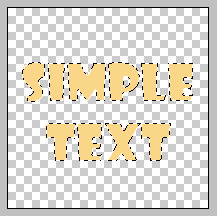
And it gonna be like this.
 |
| Text selected |
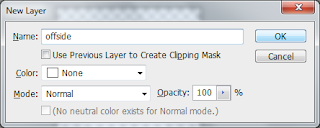
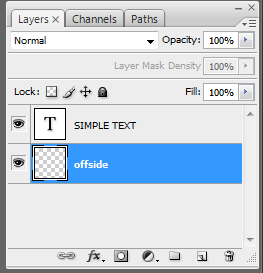
After that we create the new layer by pressing Ctrl + Shift + N, Set the name into "offside" and then click Ok.
 |
| Create New Layer |
And the new layer had been made.
 |
| The New Layer |
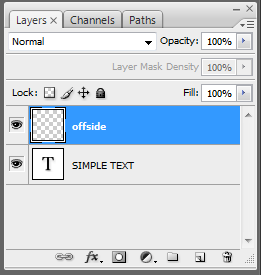
After that set the position of the offside layer on the bottom of the text layer
 |
| Below the Text |
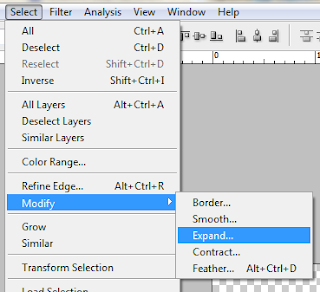
Then select the Offside layer and do this.
Click Select > Modify > Expand...
 |
| Create the Offside Part |
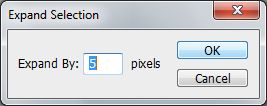
And the Expand Selection will show, after that we set the Expand By into 5.
 |
| Set the Expand |
And Now we change the color by pressing Shift + BackSpace, the "Fill" window will show up, in this window we set the content > use into foreground color and click Ok, and its gonna be like this. Press Ctrl + D to remove the selection.
 |
| The Expand Part |
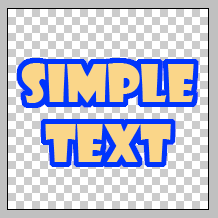
Step 4 Final Touch
For the final touch we can add a little decorating by using The Brush tool on the Tool Box. For this time I use the Vector Flower Brush Style. You can download the Brush Style in here. Don't forget to make a different layer for each style brush that we use. And this is the final result.
 |
| The Final Result |
Ok that's all for tutorial today. I hope you can understand it easly. See ya in the next tutorial.


8 comments:
yeeey mantap lah sob :D
dasar banget nih !
tapi oke :)
@four dreams : Makasih bro... :D
@Secangkir Teh dan Sekerat Roti : ya begitulah gan, kan semuanya harus dimulai dari dasar. :-indo
widih
jadi master sotosop ne
keren2 bro
@Rezky : Ah gak juga kok bro, aku masih dalam tahap pembelajaran masih pemula. :)
beh masih parahan aku berarti bro
aku newbinya pemula
hahaha
@Rezky : hahahaha..... ada - ada sajo u bro.... mana ada newbiinya pemula?????
semoga sukses all dg bisnis photoshop nya
Post a Comment